


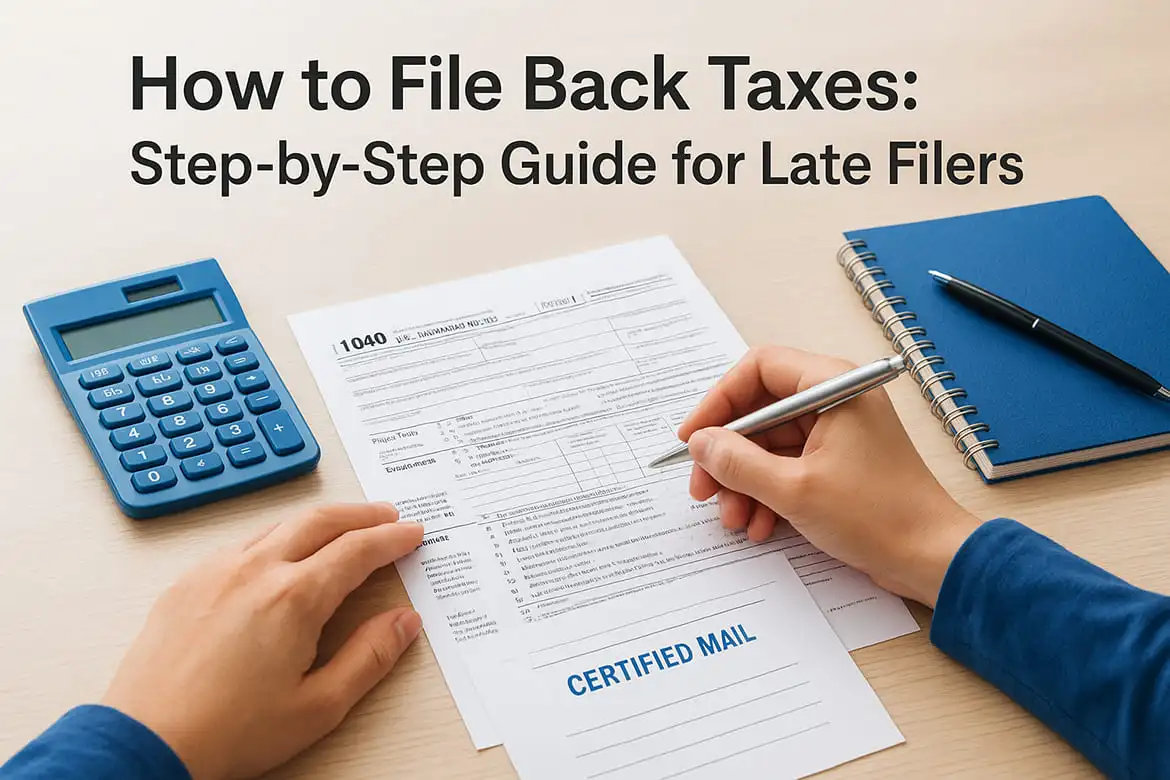
How to File Back Taxes: Step-by-Step Guide for Late Filers
You missed a filing deadline. Maybe it was one year, maybe it was several years. Whatever the reason, you now face the reality of needing to know how to file back taxes. The IRS doesn't forget unfiled returns, and the longer you wait, the worse the penalties and interest become. Each month you delay adds to what you owe.
Here's the good news: filing past due returns is straightforward once you understand the process. You can gather your missing documents, locate the correct tax forms for each year, prepare your returns, and submit them to get back in compliance. The IRS actually wants you to file, even if you can't pay everything right away.
This guide walks you through every step to file your back taxes, from retrieving your income documents to choosing the right payment option. You'll learn about the penalties you face, the deadlines for claiming refunds, and exactly what forms and addresses you need for each tax year. By the end, you'll know how to handle your past due returns and move forward with a clean slate.
Why you must file past due returns now
The IRS tracks every unfiled tax return. When you skip a year, the government doesn't just forget about it. Instead, your account gets flagged, and the penalties start accumulating immediately. Each missing return creates a growing debt that compounds with interest, and the longer you wait, the harder it becomes to resolve.

The penalties grow every month
Your failure-to-file penalty starts at 5% of your unpaid tax balance for each month (or part of a month) your return is late. This penalty can reach a maximum of 25% of what you owe. If you owe $5,000 in taxes for a year you didn't file, you could face an additional $1,250 in penalties alone after just five months.
Interest compounds on top of these penalties. The IRS charges interest on both your unpaid tax and your unpaid penalties, creating a snowball effect. The current IRS interest rate adjusts quarterly, and it applies from the original due date of your return until you pay the full amount. Filing today stops the failure-to-file penalty from growing any larger.
You can't claim refunds forever
The IRS only gives you three years from the original filing deadline to claim a refund. If you're entitled to a refund for tax year 2022, you must file by April 15, 2026 (or the tax deadline for that year) to receive your money. Miss that window, and the government keeps your refund permanently.
You forfeit every dollar of your refund if you don't file within three years of the original deadline.
Many people avoid filing because they assume they owe money, only to discover later that they actually qualified for a refund. By waiting too long, they lose thousands of dollars that belonged to them. Filing your past due returns now ensures you don't leave money on the table while you still have the chance to claim it.
Unfiled returns block financial opportunities
Lenders require proof of income when you apply for mortgages, car loans, and business financing. They want to see your tax transcripts from recent years to verify what you earn. When you haven't filed, you can't provide these documents, and lenders reject your application immediately.
Government programs also check your filing status. You can't receive Social Security benefits in full, claim certain tax credits, or participate in income-based programs without current tax returns on file. Small business owners face even bigger problems because they can't prove their income to suppliers, landlords, or potential investors.
College financial aid applications require tax information from both students and parents. Your child's FAFSA application gets held up when you haven't filed your returns, potentially costing your family thousands in grants and loans. Professional licenses in certain states also require proof of tax compliance, meaning unfiled returns can jeopardize your career.
The IRS can file substitute returns for you
When you ignore your filing obligation long enough, the IRS files a Substitute for Return (SFR) on your behalf. This return uses only the income information the government has on file, such as W-2s and 1099s reported by your employers and clients. The problem is that the IRS doesn't include deductions, credits, or expenses you're entitled to claim.
Your SFR typically shows a much higher tax bill than you would actually owe if you filed yourself. The IRS doesn't claim the standard deduction for you, doesn't include your dependents, and doesn't factor in business expenses or itemized deductions. This inflated tax assessment becomes official, and the government begins collection actions based on the wrong numbers.
Once the IRS files an SFR, you lose control of your tax situation. Collection notices arrive, wage garnishments begin, and bank levies can drain your accounts without warning. You can challenge an SFR by filing the correct return yourself, but this process takes months and still leaves you dealing with penalties and interest that accumulated while you waited. Understanding how to file back taxes before the IRS takes action keeps you in the driver's seat and saves you from paying more than you actually owe.
Step 1. Gather your missing income documents
You can't file accurate tax returns without knowing exactly how much you earned in each year you missed. Your income documents prove what you made and what taxes were already withheld from your paychecks. These records form the foundation of every tax return, and the IRS already has copies of most of them on file.
Request your IRS wage and income transcripts
The IRS keeps records of all W-2 forms and 1099 forms that employers and clients submitted on your behalf. You can request a wage and income transcript for any past year directly from the government, and this document shows every piece of income the IRS knows about.
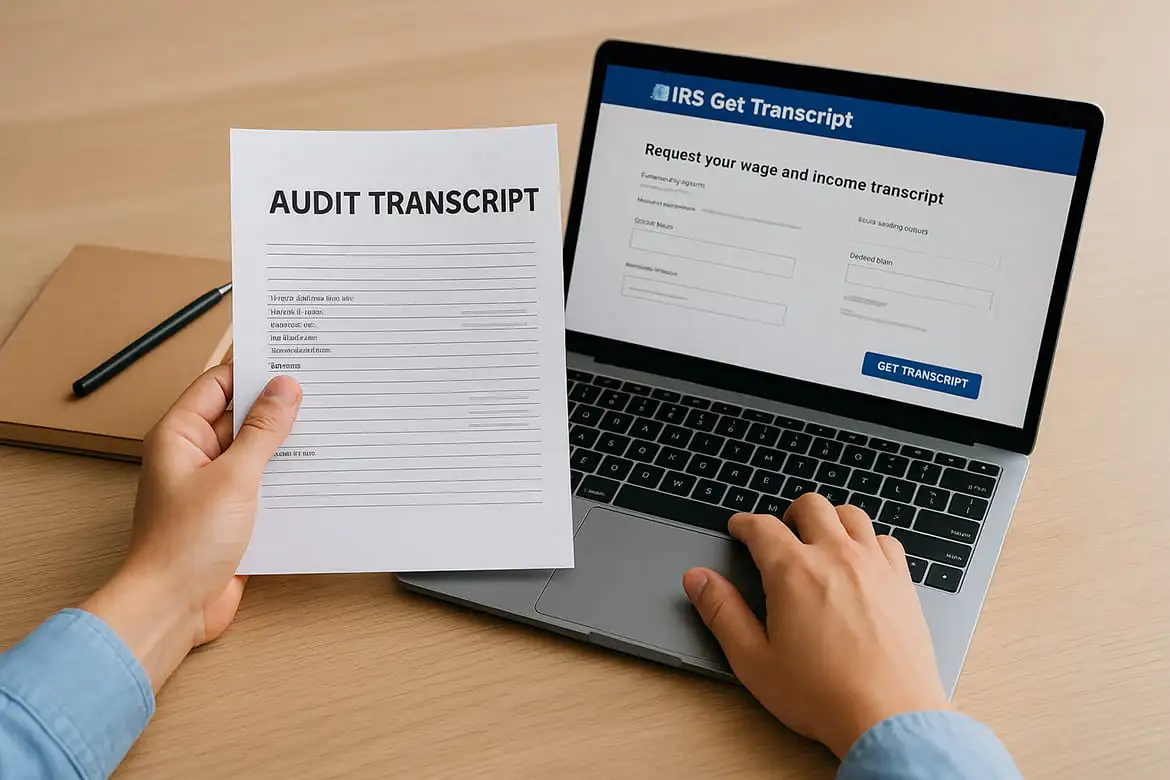
Order your transcripts through the IRS Get Transcript Online tool at IRS.gov. Create an account, verify your identity with your Social Security number and credit information, and select the tax years you need. The system displays your wage and income transcripts immediately on screen, and you can download or print them for your records.
The IRS provides your income transcripts for free, showing all W-2s and 1099s reported under your Social Security number.
If you can't access the online system, call the IRS directly at 1-800-908-9946 and request transcripts by phone. You can also submit Form 4506-T by mail, though this method takes several weeks to process. The transcripts arrive by mail to your current address on file with the IRS.
Contact your employers and clients directly
Your wage and income transcripts might not show everything you earned. Some employers go out of business, small businesses fail to file their reporting forms, or you worked cash jobs that never got reported to the government. When gaps appear in your IRS transcripts, you need to contact the people who paid you.
Reach out to former employers and ask for duplicate W-2 forms for the specific years you need. Most payroll systems keep records going back seven years or more. Provide the exact tax year and your Social Security number to help them locate your information quickly. Former clients who paid you as a contractor can also reissue 1099-NEC or 1099-MISC forms if you ask.
Use your bank statements as backup documentation
Your bank maintains records of all deposits and withdrawals for several years. Request copies of your bank statements for each missing tax year, and review every deposit carefully. These statements show when money hit your account, helping you identify income sources you might have forgotten.
Look for patterns in your deposits. Regular paychecks appear every two weeks or twice monthly, while freelance payments arrive irregularly. Credit card statements also reveal business expenses you can deduct if you were self-employed. When learning how to file back taxes, these financial records help you reconstruct your income and expenses even when you don't have official tax forms.
Mark every deposit that represents taxable income, then categorize them by source. This creates a backup income report you can use to prepare your returns, especially for cash income that never generated a W-2 or 1099.
Step 2. Locate the correct forms for each tax year
The IRS updates tax forms every year with new rules, rates, and line items. You can't use the 2026 version of Form 1040 to file your 2021 taxes because the forms don't match the tax laws that applied back then. Each year you missed requires the specific forms that were current during that tax period, and the IRS archives all these old versions on its website.
Find forms on the IRS website
The IRS maintains a Prior Year Products page where you can download forms from any tax year going back decades. Navigate to IRS.gov and search for "prior year forms" or go directly to the forms and publications section. Select the tax year you need, and the system displays all available forms for that period.
Every form includes the tax year printed in the top corner. When you download Form 1040 for tax year 2021, you'll see "2021" clearly marked on the document. This prevents confusion when you're working on multiple years at once. Download all the forms you need for each year separately, and keep them organized in labeled folders on your computer or in physical files.
You must use the exact form version from each tax year you're filing, not the current year's forms.
The IRS website also provides instructions booklets for each form and year. These instructions explain the tax laws that applied during that specific period, showing you which deductions you could claim and how to calculate your tax liability correctly. Download both the forms and the instruction booklets together.
Match form versions to tax years
Your main tax return form changed names over recent years. Tax years 2017 and earlier used the traditional Form 1040, along with Form 1040A and 1040EZ for simpler returns. Starting in tax year 2018, the IRS redesigned everything into a single Form 1040 with numbered schedules replacing the old 1040A and 1040EZ.
If you're filing returns for 2020 through 2024, you need the redesigned Form 1040 for those years. Returns for 2017 and earlier require the old form versions. Check which schedules you need based on your income sources: Schedule C for self-employment income, Schedule D for investment sales, and Schedule E for rental property income.
Business owners filing back taxes need additional forms like Schedule SE for self-employment tax and potentially Form 1120 or 1120S for corporate returns. Each of these forms also comes in year-specific versions. The 2019 Schedule C differs from the 2023 version because tax rules for business deductions changed during those years.
Download state tax forms separately
Your state requires its own tax return for each year you missed filing. Visit your state's department of revenue website and locate their prior year forms section. Most states archive at least seven years of old forms online, though some only keep the past three to five years available for download.
State forms change independently from federal forms. California's Form 540 for 2020 differs from its 2023 version, and the calculations don't always align with IRS changes. When you're figuring out how to file back taxes, remember that you need both federal and state forms for every year, and both sets must match the specific tax year you're preparing.
Step 3. Prepare your past due tax returns
You now have your income documents and the correct forms for each year. The next step is to actually complete those tax returns, calculating your income, deductions, and final tax liability for every year you missed. This preparation process requires careful attention because errors lead to processing delays, additional notices, and potential audits.

Choose between self-preparation and professional help
You can prepare your past due returns yourself using the paper forms you downloaded from the IRS. Work through each form following the instructions booklet for that specific year, entering your income from W-2s and 1099s on the appropriate lines. Calculate your standard deduction or itemized deductions using the amounts that applied during that tax year, not current rates.
Tax preparation software offers another option, but most programs only support the current year and previous two years. If you're filing returns from 2022 or earlier, you'll likely need to work with paper forms or find specialized software that handles older years. Professional tax preparers who understand how to file back taxes can access software for any past year and handle complex situations like amended returns or business filings.
Fill out each form line by line
Start with your personal information section at the top of Form 1040. Enter your name exactly as it appears on your Social Security card, your current mailing address, and your Social Security number. Mark your filing status (single, married filing jointly, head of household) based on your situation during that specific tax year, not your current status.
Enter your income exactly as shown on your W-2s and 1099s, matching the amounts to the correct line numbers for that tax year.
Move to the income section and transfer amounts from your wage and income documents. Your W-2 wages go on the wages line, 1099 income gets reported in the appropriate category (self-employment, interest, dividends), and any other income sources get added where the instructions specify. Total all income sources to arrive at your adjusted gross income.
The deductions section comes next. Claim the standard deduction amount that applied during that tax year, or prepare Schedule A if you're itemizing deductions like mortgage interest, property taxes, and charitable contributions. Each year had different standard deduction amounts, so verify you're using the correct figure from the instructions for that specific year.
Calculate your tax liability accurately
Use the tax tables provided in the instructions booklet to find your tax amount. Locate your income range in the left column, then move across to the column matching your filing status. The number you find represents your base tax before credits. Don't use current year tax tables because rates changed over time.
Subtract any tax credits you qualify for, such as the child tax credit, earned income credit, or education credits. Each credit has its own form or worksheet in the instructions. Apply any taxes you already paid through withholding (shown on your W-2) or estimated tax payments you made during the year. The result shows whether you owe additional tax or qualify for a refund.
Step 4. Mail your documents to the correct address
The IRS processes past due returns at different addresses than current year filings, and your specific mailing address depends on which state you live in and whether you're including payment with your return. Sending your documents to the wrong location delays processing by weeks or months, so you need to verify the exact address before you seal the envelope.
Find your IRS mailing address by state
Your mailing address changes based on your current state of residence, not where you lived during the tax year you're filing. The IRS divides the country into regions, and each region has two addresses: one for returns with payment and one for returns without payment or expecting a refund.
Check the instructions booklet for the specific tax year you're filing to find your correct address. The IRS updates these addresses periodically, so the 2021 instructions might show different addresses than the 2024 instructions. Look for the section titled "Where to File" near the end of the instruction booklet. This section lists all states alphabetically with their corresponding IRS processing center addresses.
Never mail past due returns to your local IRS office or the address shown on collection notices you received.
If you're filing returns for multiple years, you need to mail each year in a separate envelope to its designated address. Don't combine tax year 2021 and 2022 returns in one package because they might require different processing centers or the forms might get separated during intake.
Include all required attachments
Your envelope must contain your completed Form 1040 and all supporting schedules like Schedule C for business income or Schedule A for itemized deductions. Attach any forms showing tax withholding, including your W-2s, 1099s with federal tax withheld, and Form 1099-G if you received state tax refunds that year.
Place all pages in order with Form 1040 on top, followed by schedules in numerical order, then your W-2s and 1099s. Staple multiple pages together in the upper left corner. If you're including a payment, attach your check or money order to the front of Form 1040 using the payment voucher (Form 1040-V for most years).
Send your return with tracking proof
Mail your tax return using certified mail with return receipt requested at your local post office. This service costs around $8 to $10 and provides you with a tracking number plus confirmation when the IRS receives your envelope. You'll get a green card in the mail showing the date of delivery and the signature of the person who accepted your package.
Keep your certified mail receipt and returned green card with your tax records. These documents prove you filed by a specific date if the IRS later claims they never received your return. Understanding how to file back taxes includes protecting yourself with delivery confirmation, especially since the IRS processing centers sometimes lose or misplace documents during peak periods.
Write your Social Security number on any check or money order you include, along with the tax year and form number (for example, "2021 Form 1040"). This helps the IRS apply your payment to the correct account if your check gets separated from your return during processing.
Step 5. Pay your tax bill or request a payment plan
You've prepared your returns and now face the total amount you owe across multiple years. The IRS offers several payment options depending on how much you owe and your ability to pay. Paying immediately stops additional interest from accumulating, but payment plans exist when you can't afford to pay everything at once.
Pay in full to stop interest immediately
Your fastest route to clearing your tax debt is paying the full balance as soon as possible. The IRS accepts payments through IRS Direct Pay on their website, allowing you to transfer funds directly from your bank account without any fees. You can also pay by debit card, credit card, or check sent with your tax return.
When you pay in full, the IRS stops charging interest on that tax year immediately. Each day you delay costs you more money through compounding interest. Make separate payments for each tax year you're paying, and include your Social Security number and the tax year on each payment to ensure proper crediting to your account.
Paying your tax debt in full stops all penalty and interest charges on the day the IRS receives your payment.
Set up a short-term payment plan
The IRS offers short-term payment plans for balances under $100,000 that you can pay within 120 days. Apply online through the IRS payment plan tool or call 1-800-829-1040 to request this option. You won't pay a setup fee for short-term plans, making them the most cost-effective choice when you need just a few months.
Your payment plan covers all tax years you owe combined into one total balance. Divide your total debt by the number of months you need (up to 120 days or roughly four months), and schedule your payments accordingly. Interest continues accumulating during this period, but you avoid the larger failure-to-pay penalties that apply to completely unpaid balances.
Request an installment agreement for larger debts
Larger tax debts require a formal installment agreement, which spreads your payments over months or even years. Apply online if you owe less than $50,000 in combined tax, penalties, and interest. You'll pay a setup fee ranging from $31 to $225 depending on how you apply and how you make payments.
Your monthly payment amount gets calculated based on your total debt and the maximum time the IRS allows for repayment. Provide your financial information including income, expenses, and assets when you apply. The IRS uses this data to determine what you can reasonably afford to pay each month. Once approved, you make consistent monthly payments until your balance reaches zero, and learning how to file back taxes becomes less stressful when you have a manageable payment structure in place.
Time limits for claiming old tax refunds
The IRS doesn't hold your refund money forever. You face a strict three-year deadline to claim any refund you're owed, and this clock starts ticking from the original tax filing deadline for that year. Miss this window, and the government keeps every dollar of your refund permanently, treating it as abandoned property that goes into the general treasury fund.
The three-year deadline for refund claims
Your refund claim period begins on the original due date of the tax return, which is typically April 15th of the year following the tax year. For tax year 2022, the original deadline was April 15, 2023. You have exactly three years from that date to file your return and claim your refund, giving you until April 15, 2026 for the 2022 tax year.

The IRS extends this deadline slightly when the original due date falls on a weekend or federal holiday. Tax year 2021 had an original deadline of April 18, 2022 (since April 15 fell on Good Friday and April 16-17 was a weekend). Your three-year window for claiming that refund extends to April 18, 2025. Calculate your deadline carefully because filing even one day late means forfeiting your entire refund.
You lose every penny of your tax refund if you file after the three-year deadline, regardless of how much money you're owed.
This rule applies whether you owe $100 or $10,000 in refunds. The IRS treats all unclaimed refunds the same way. If you qualified for the earned income credit, child tax credit, or had excess withholding from your paychecks, that money disappears if you don't file within the three-year window.
Calculate your exact filing deadline
Track your deadline using this simple calculation: take the original tax return deadline for the year in question and add exactly three years. Here are specific examples for recent tax years:
- Tax Year 2023: Original deadline April 15, 2024 → File by April 15, 2027
- Tax Year 2022: Original deadline April 15, 2023 → File by April 15, 2026
- Tax Year 2021: Original deadline April 18, 2022 → File by April 18, 2025
- Tax Year 2020: Original deadline April 15, 2021 → Deadline passed April 15, 2024
Extensions you filed during the original tax year don't extend your three-year refund window. If you filed an extension for tax year 2021 and didn't submit your return until October 2022, your three-year deadline still runs from the April 18, 2022 original due date, not from your extended deadline. Understanding how to file back taxes means recognizing that extensions only postpone when you must file, not when your refund expires.
What happens when you miss the window
Once your three-year deadline passes, the IRS closes your account for that tax year and marks any refund as expired. You can still file the return to satisfy your legal obligation to file, but the government won't issue a refund check. Your withholding and tax credits become property of the U.S. Treasury, and no appeal or special circumstance will recover this money.
Limited exceptions exist for military service members deployed to combat zones, who get extra time to file and claim refunds. Taxpayers who are mentally or physically unable to manage their finances might also qualify for extensions under certain circumstances, though these require formal documentation and IRS approval before the original deadline expires.
Understanding failure-to-file penalties
The IRS charges you a failure-to-file penalty the moment your tax return misses its deadline. This penalty hits harder than any other tax penalty you'll encounter, costing you 5% of your unpaid tax for each month or partial month your return remains unfiled. The government designed this steep penalty to motivate taxpayers to file on time, and it accumulates automatically without any additional notice or warning from the IRS.
How the 5% monthly penalty compounds
Your penalty calculation starts with your total unpaid tax balance for the year. The IRS multiplies this amount by 5% for the first month your return is late, then adds another 5% for each additional month. A return that's three months late carries a 15% penalty on top of your original tax debt.
Calculate your penalty using this formula: Unpaid Tax × 0.05 × Number of Months Late = Failure-to-File Penalty. If you owe $8,000 in taxes for a year and your return is four months late, your penalty equals $8,000 × 0.05 × 4 = $1,600. This amount gets added to your original tax bill, and interest compounds on both the tax and the penalty.
The failure-to-file penalty costs you 10 times more than the failure-to-pay penalty for the same tax debt.
Partial months count as full months when the IRS calculates your penalty. Your return filed on January 5 when it was due December 15 counts as two months late (December and January), not one month. This rounding rule means you pay the full 5% penalty even when you miss the deadline by just a few days.
Maximum penalty caps at 25%
Your failure-to-file penalty stops growing after it reaches 25% of your unpaid tax, which happens at five months of lateness. A $10,000 tax bill generates a maximum $2,500 failure-to-file penalty regardless of how many additional years pass before you file. The penalty freezes at this point, though interest continues accumulating on your total balance.
This 25% cap applies separately to each tax year you haven't filed. Your 2021 penalty can max out at 25% while your 2022 penalty keeps climbing toward its own 25% limit. When learning how to file back taxes for multiple years, remember that each year carries independent penalties that max out individually.
Combined penalties multiply your debt
The IRS charges both a failure-to-file penalty and a separate failure-to-pay penalty when you don't file and don't pay. The failure-to-pay penalty adds 0.5% per month (up to 25%) of your unpaid tax. When both penalties apply during the same month, the IRS reduces your failure-to-file penalty from 5% to 4.5%, so your combined penalty for that month equals 5% total.
Here's how penalties stack for a $6,000 tax debt over six months:
| Month | Failure-to-File | Failure-to-Pay | Combined Monthly Penalty | Cumulative Penalty |
|---|---|---|---|---|
| 1 | 4.5% ($270) | 0.5% ($30) | $300 | $300 |
| 2 | 4.5% ($270) | 0.5% ($30) | $300 | $600 |
| 3 | 4.5% ($270) | 0.5% ($30) | $300 | $900 |
| 4 | 4.5% ($270) | 0.5% ($30) | $300 | $1,200 |
| 5 | 4.5% ($270) | 0.5% ($30) | $300 | $1,500 |
| 6 | 0% ($0) | 0.5% ($30) | $30 | $1,530 |
After month five, only the failure-to-pay penalty continues accruing because the failure-to-file penalty reached its 25% maximum. Your $6,000 tax debt becomes $7,530 after just six months of non-filing and non-payment, plus additional interest charges on the entire amount.

Get back in good standing
You now understand how to file back taxes and the exact steps to take. Filing your past due returns stops penalties from growing, preserves your refund claims before they expire, and restores your financial credibility with lenders and government programs. The process requires gathering your income documents, downloading the correct forms for each year, preparing accurate returns, and mailing everything to the right IRS address.
Starting today puts you ahead of millions of Americans who continue avoiding their unfiled returns. Each return you complete removes one more year from your tax burden and brings you closer to full compliance. Professional help speeds up this process and ensures you claim every deduction you deserve while avoiding costly errors that trigger audits.
Get professional tax preparation help to file your back taxes accurately and maximize your refunds for each year you missed.